
DIY Ceiling Cabinets for Extra Storage in the Van
Materials needed for this project —>
Plywood
Table saw, jigsaw, some sort of saw
A sander or sand paper and strong arms
2" decking screws
Wood glue, a nail gun, or pocket hole screws

I’m here for ya.
Seriously! Reach out on Instagram or YouTube with questions.
The videos are always fun and interesting.
Step 1:
Decide where and what size you want your cabinets.
I went for two long cabinets. One over the desk area (the larger of the two cabinets) and one over the soon-to-be-built bed. The one over the bed had to be smaller than the one over the desk due to the fact I will be getting up and down from the couch and therefore have to be aware of where my head will be.
I knew I wanted to try to keep the headspace in the van as uncrowded as possible so I kept the cabinets smaller than they could be as far as depth. I don’t want the van feeling tight and crowded. The entire design was centered around an idea of flow. Air and movement should flow through the van from any angle (the cab, the rear doors, the side sliding door).


Step 2:
Cut and shape a template piece.
This is the most difficult part, in my opinion. Be patient and go the extra mile with your template piece since this dictates how the cabinets turn out!
For the first, larger cabinet over the desk, I cut a 15” x 15” piece of 3/4” plywood, brought it into the van and started to eyeball the curve of the wall meeting the ceiling and cutting pieces off the back and top sides of the 3/4” 15x15 plywood.
Slowly is the key word here. Don’t jump ahead and make a big cut you think will work. You can always take more off (slowly). You can’t add more wood back onto the plywood piece.
I slowly cut and sanded until I was happy with how my piece fit the ceiling (the back top of the plywood piece was cut and sanded while the front bottom portion remained square and untouched. This is so that the cabinet has the best possible chance of being level and flat once fitted to the ceiling).
I used a piece of plywood standing on top of the 2x4 supports for my desk as my gauge of what “level” was in the van. This allows me to cut, sand, and fit the template piece to the curve of the roof in relation to what “level” in the van is (so that the cabinet has a right angled/90 degree face).
Step 3:
Use the template to cut other supports.
My cabinets are about 70-80” long so I used 3 vertical support pieces for that length (one on each end and one in the middle). I placed each template on top of one solid piece of 3/4” plywood for maximal strength (one solid piece rather than several interconnected ones)
NOTE: As it turned out, I was able to use the same template shape for both sides of the van to build both my cabinets. You could too so try fitting the template piece (or one of its replicates) against the other side of the van (if you plan to do two cabinets like me) before you glue all your template pieces to a piece of wood!


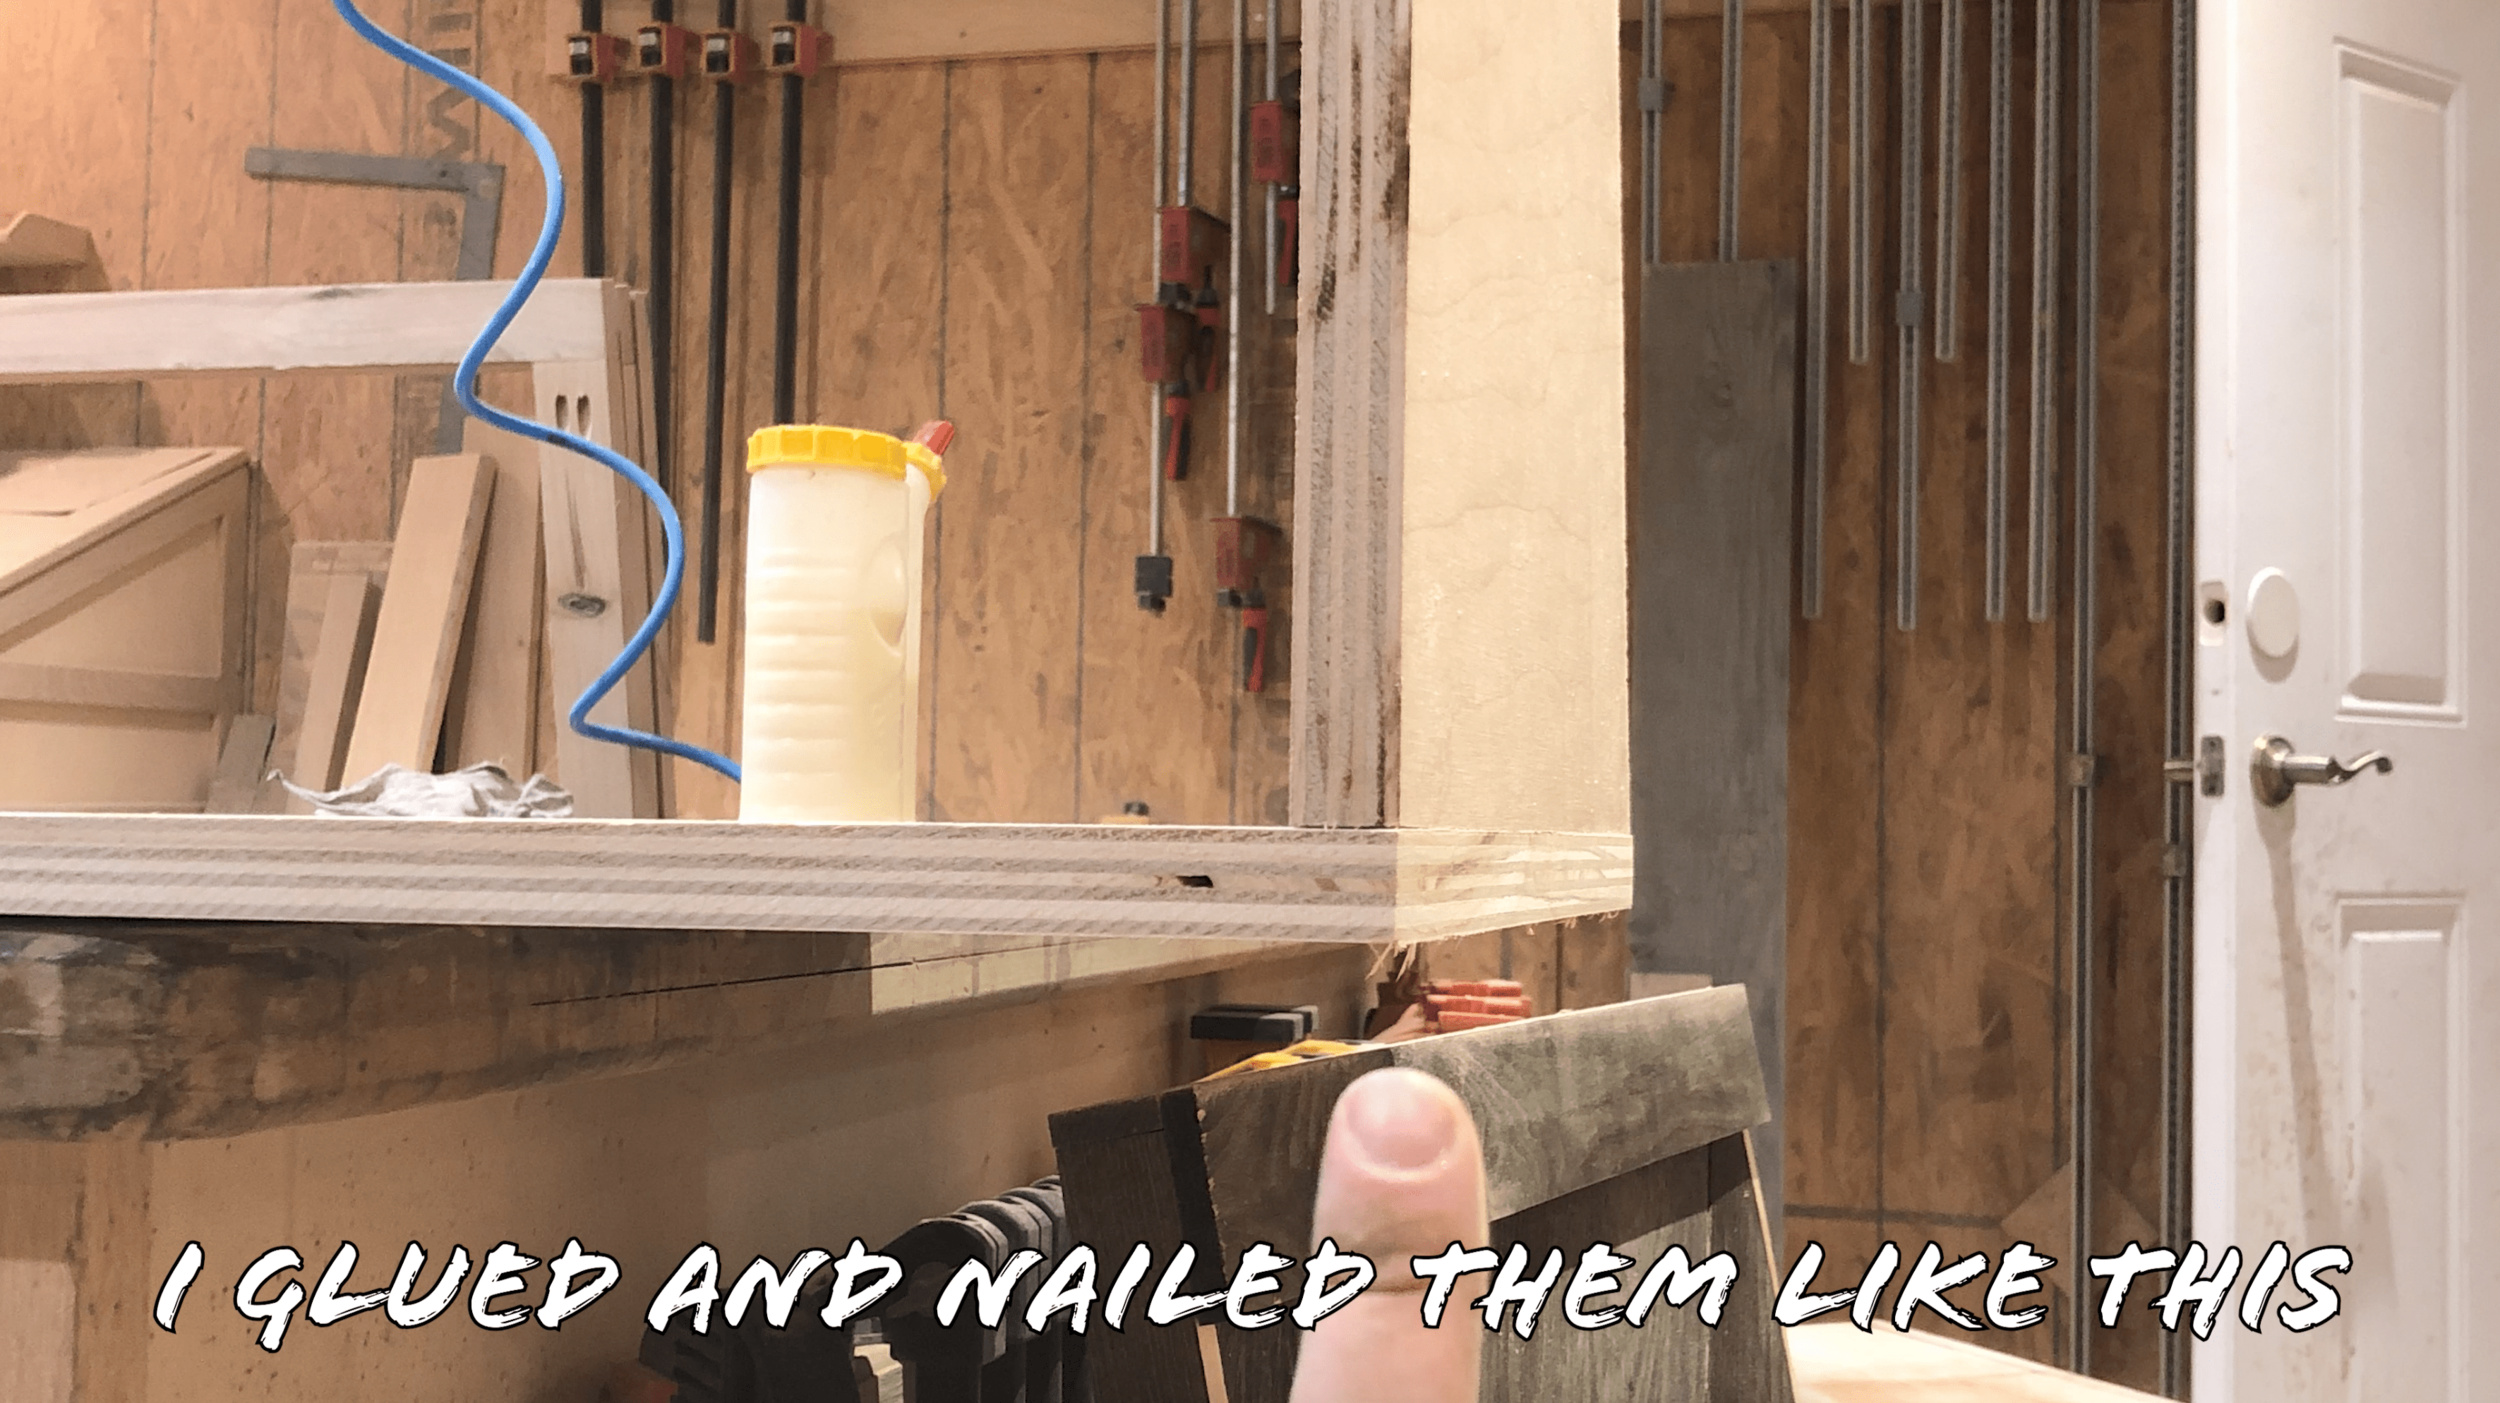
Step 4:
Glue and pin nail/screw.
I used mostly wood glue and a pin nailer to secure each vertical support piece to the main bottom piece. You can use pocket holes but ultimately your goal is simple to get the two pieces of wood to sit tight and snug with wood glue between them so it can dry and secure the bond between the two pieces.
The nails/screws aren’t what holds the wood together, it’s really the glue, believe it or not.
Step 5:
Cut and attach rear and front support slats.
The rear slats (one near the bottom and one near the top between the vertical supports) are what I drove “2 decking screws through into the furring strips in the walls of the van.
NOTE: eventually, I went back and drove 4” decking screws through the rear slats into the ceiling furring strips as well since I wanted the extra structural support and connection strength (all the bouncing on dirt roads made me worry about the cabinets rocking loose from their wall-mounted position.
The front top slats are what I mounted the piano hinge for the swinging door to. The bottom ones serve as a lip for the cabinet as well as the place for the swinging cabinet door to close against.
Everything was glued and pin nailed or pocket holed. If you have super long clamps that helps hold everything tight while the glue dries.


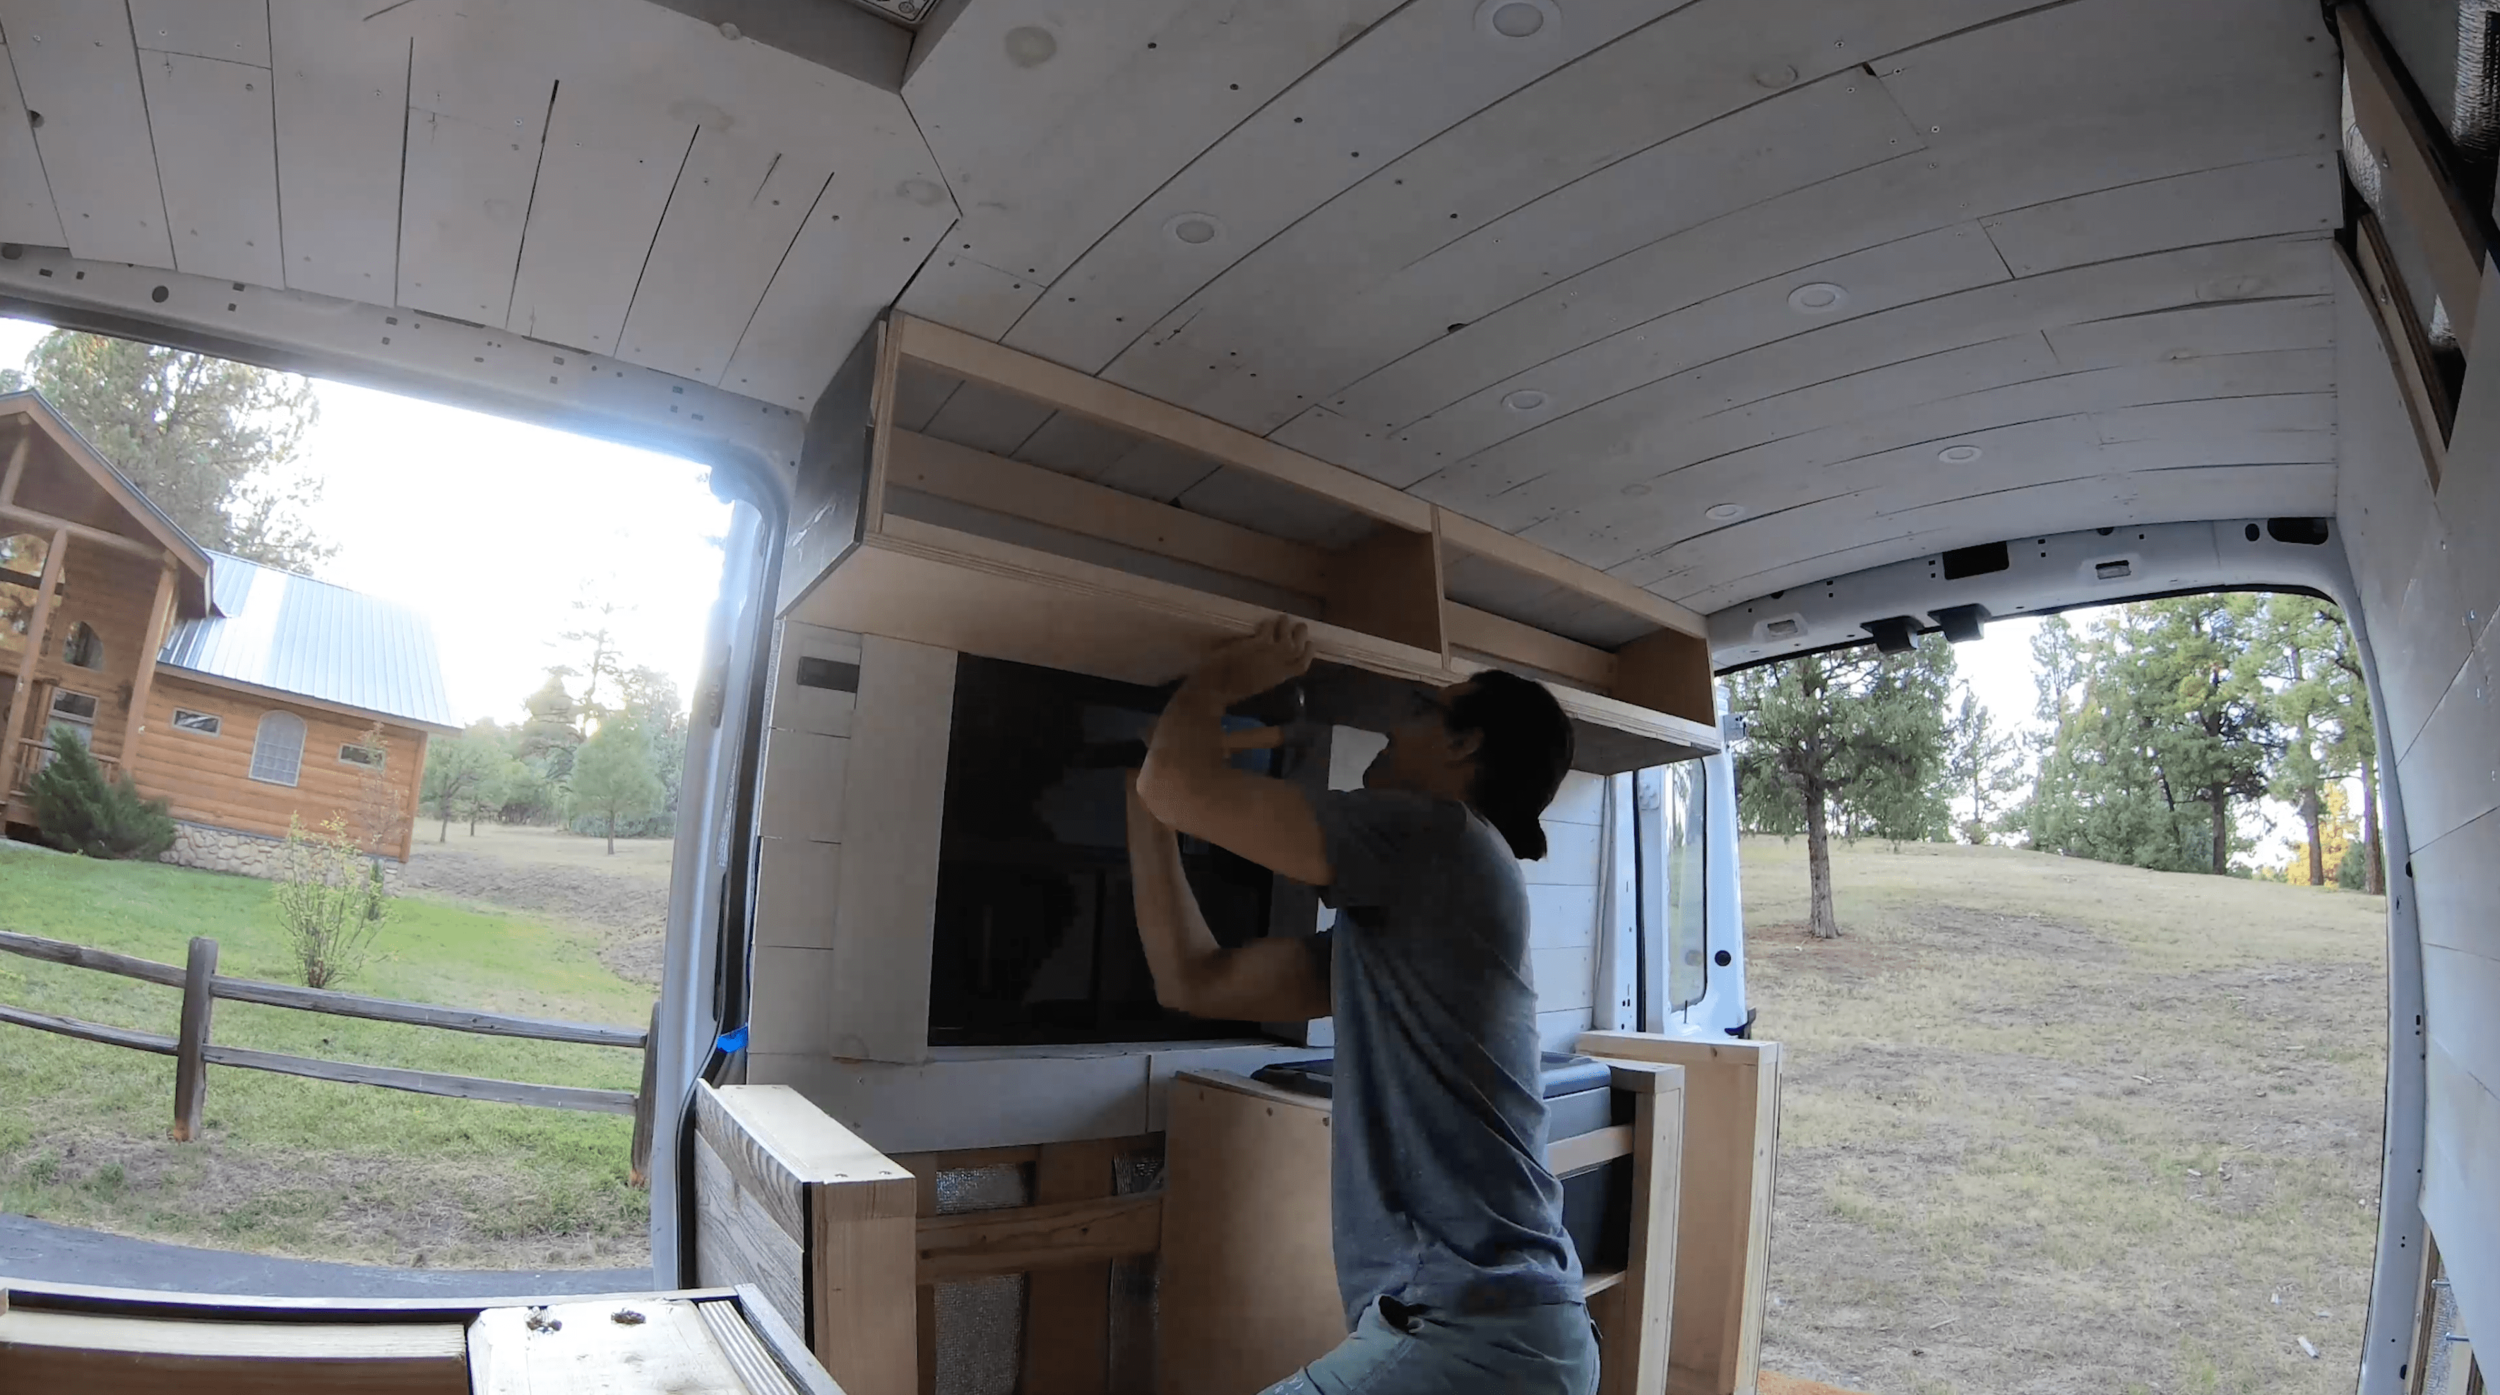
Step 6:
Mounting time!
I had a friend screw the 2” decking screws through the rear slats into the van’s furring strips (which I had marked with small pencil marks for his reference as we mounted) while I held the cabinet in place.
NOTE: How you hold that cabinet while attaching it dictates the angle of the cabinet…I accidentally held the cabinet slightly tilted and therefore it is mounted at a slight angle. It doesn’t bother me but it might bother you!
Looking back, I could have waited and done the next step (facing the wood as well as attaching the swinging doors) in the shop before mounting anything inside the van but this was a multi-day project so I did one thing at a time rather than waiting.
Step 7:
Face the cabinet to make it purty.
I used Charred Wood planks from Home Depot to face the plywood and make it look nice and match other parts of the van.
I used brown nails from my local hardware store to blend with the brown of the wood and a good old fashioned hammer like a real construction worker (tool belt pending).

Step 8:
Build the doors.
I used 1/2” plywood for the doors. I cut a piece that overlapped about 1/2” over each side of the cabinet hole, faced it with the Charred wood, put an oil rubbed piano hinge on the top, attached the oil-rubbed handles and then had a friend help me install them in the van.
NOTE: You could do this outside the van (as mentioned before) but I did it this way.
Step 9:
Door catches or latches?
At first, I installed little door catches on the inside of each door (two per door) to try to keep the doors shut while driving. Unfortunately, I drive on a lot of dirt roads and those little catches, although very pretty, were not enough to hold the doors shut.
NOTE: These same catches hold my kitchen cabinet doors shut perfectly. I think it is the fact the ceiling cabinets are attached to the wall that they cannot remain shut when the van is bumping along.
Eventually, I also bought latches to hold the cabinets securely shut. They have not come off/opened up after a few hundred miles of dirt roads so they appear to work!
The latches were a pain to install given the odd angle of the cabinet face and limited space for installation but after an hour or so of messing around with angles, I was able to find a way to install each latches so it holds the door tightly shut and is still easy to pop open.


Step 10:
Cut and place no slide tool chest liner.
I decided to use this no-slide tool chest liner in the bottoms of my cabinets so that whatever I place up there doesn’t slide around while I am driving. So far it has worked nicely!
Final thoughts:
Looking back, I could have been more patient and built the cabinets, faced them, and built and attached the doors all inside the shop before mounting them in the van. That likely would have made things a lot easier. But ultimately, the van build process is not perfect and I often do things one way only to realize later on that it could have been done better/easier/simpler. Such is the life of a DIY van builder.
Other than the order in which I completed things, I have been happy with everything. Switching to the latches instead of the catches was wise. Driving a few 4” decking screws into the ceiling’s furring strips has made the cabinets that much stronger and considering all the bumping down dirt roads I do, I am glad to have it.
