Shore Power for Off-Grid Van
Materials needed for this project —>
Self-taping metal screws
Drill with drill bits
Hole saw drill bit
Utility knife

I’m here for ya.
Seriously! Reach out on Instagram or YouTube with questions.
Watch the video if you hate reading!
Step 1:
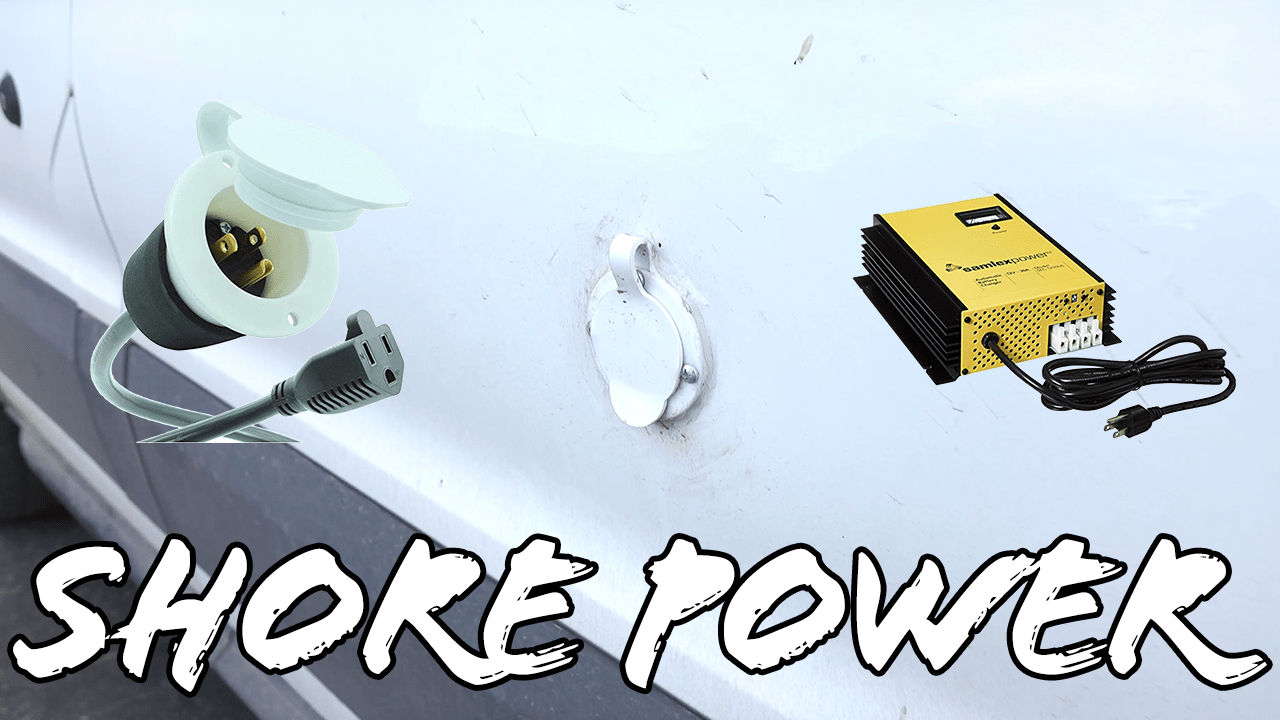
Decide how large of a charger and port you want.
The rule of thumb for lithium batteries (I am not sure if it carries over to lead acid etc.) is that your shore power charge size can reach but not exceed whatever half of your battery bank amp hour capacity is (I imagine for non-lithium batteries it would be half that again since lithiums can be drained completely but lead acid etc. are designed to only be discharged down to 50% of the battery’s capacity).
I have a combined 200ah capacity with my two Battle Born batteries therefore I could get a shore power charger sized up to 100a. (Lead acid might be 50a for a 200ah battery bank but don’t quote me on that, that’s just my gut).
I do not plan on using shore power very much. I primarily plan to drive (charging via my battery isolator) or rely on my solar for power. Shore power is a “just in case” measure in my electrical system which is why I opted for a much cheaper (the larger the charger the higher the price) and smaller, 30a charger.
I went with a 15a standard household style plug for my port since I don’t anticipate needing to plug into campgrounds without a 15a slot very often. Most campgrounds run 50a (for big RVs), 30a (what a lot of people opt for) and sometimes 15a (standard household plug) options for hookup. I have an adapter for when 15a is not an option (a simple 15a to 30a adapter that goes between the wire from my port and the campground hookup station) so I am not limited at all.
Considering the small 30a size of my shore power box, I did not need to mount a 30a port on the outside.


Step 2:
Decide on location of battery charger as well as port for outside of van.
While I was building my electrical system, I left a space on the side of the battery box free for the shore power box. I also knew roughly where in the side of the van I would be drilling a hole in order to easily run the wire from the port to the shore power box.
Step 3:
Figure out wire-lengths and location of 40a breaker.
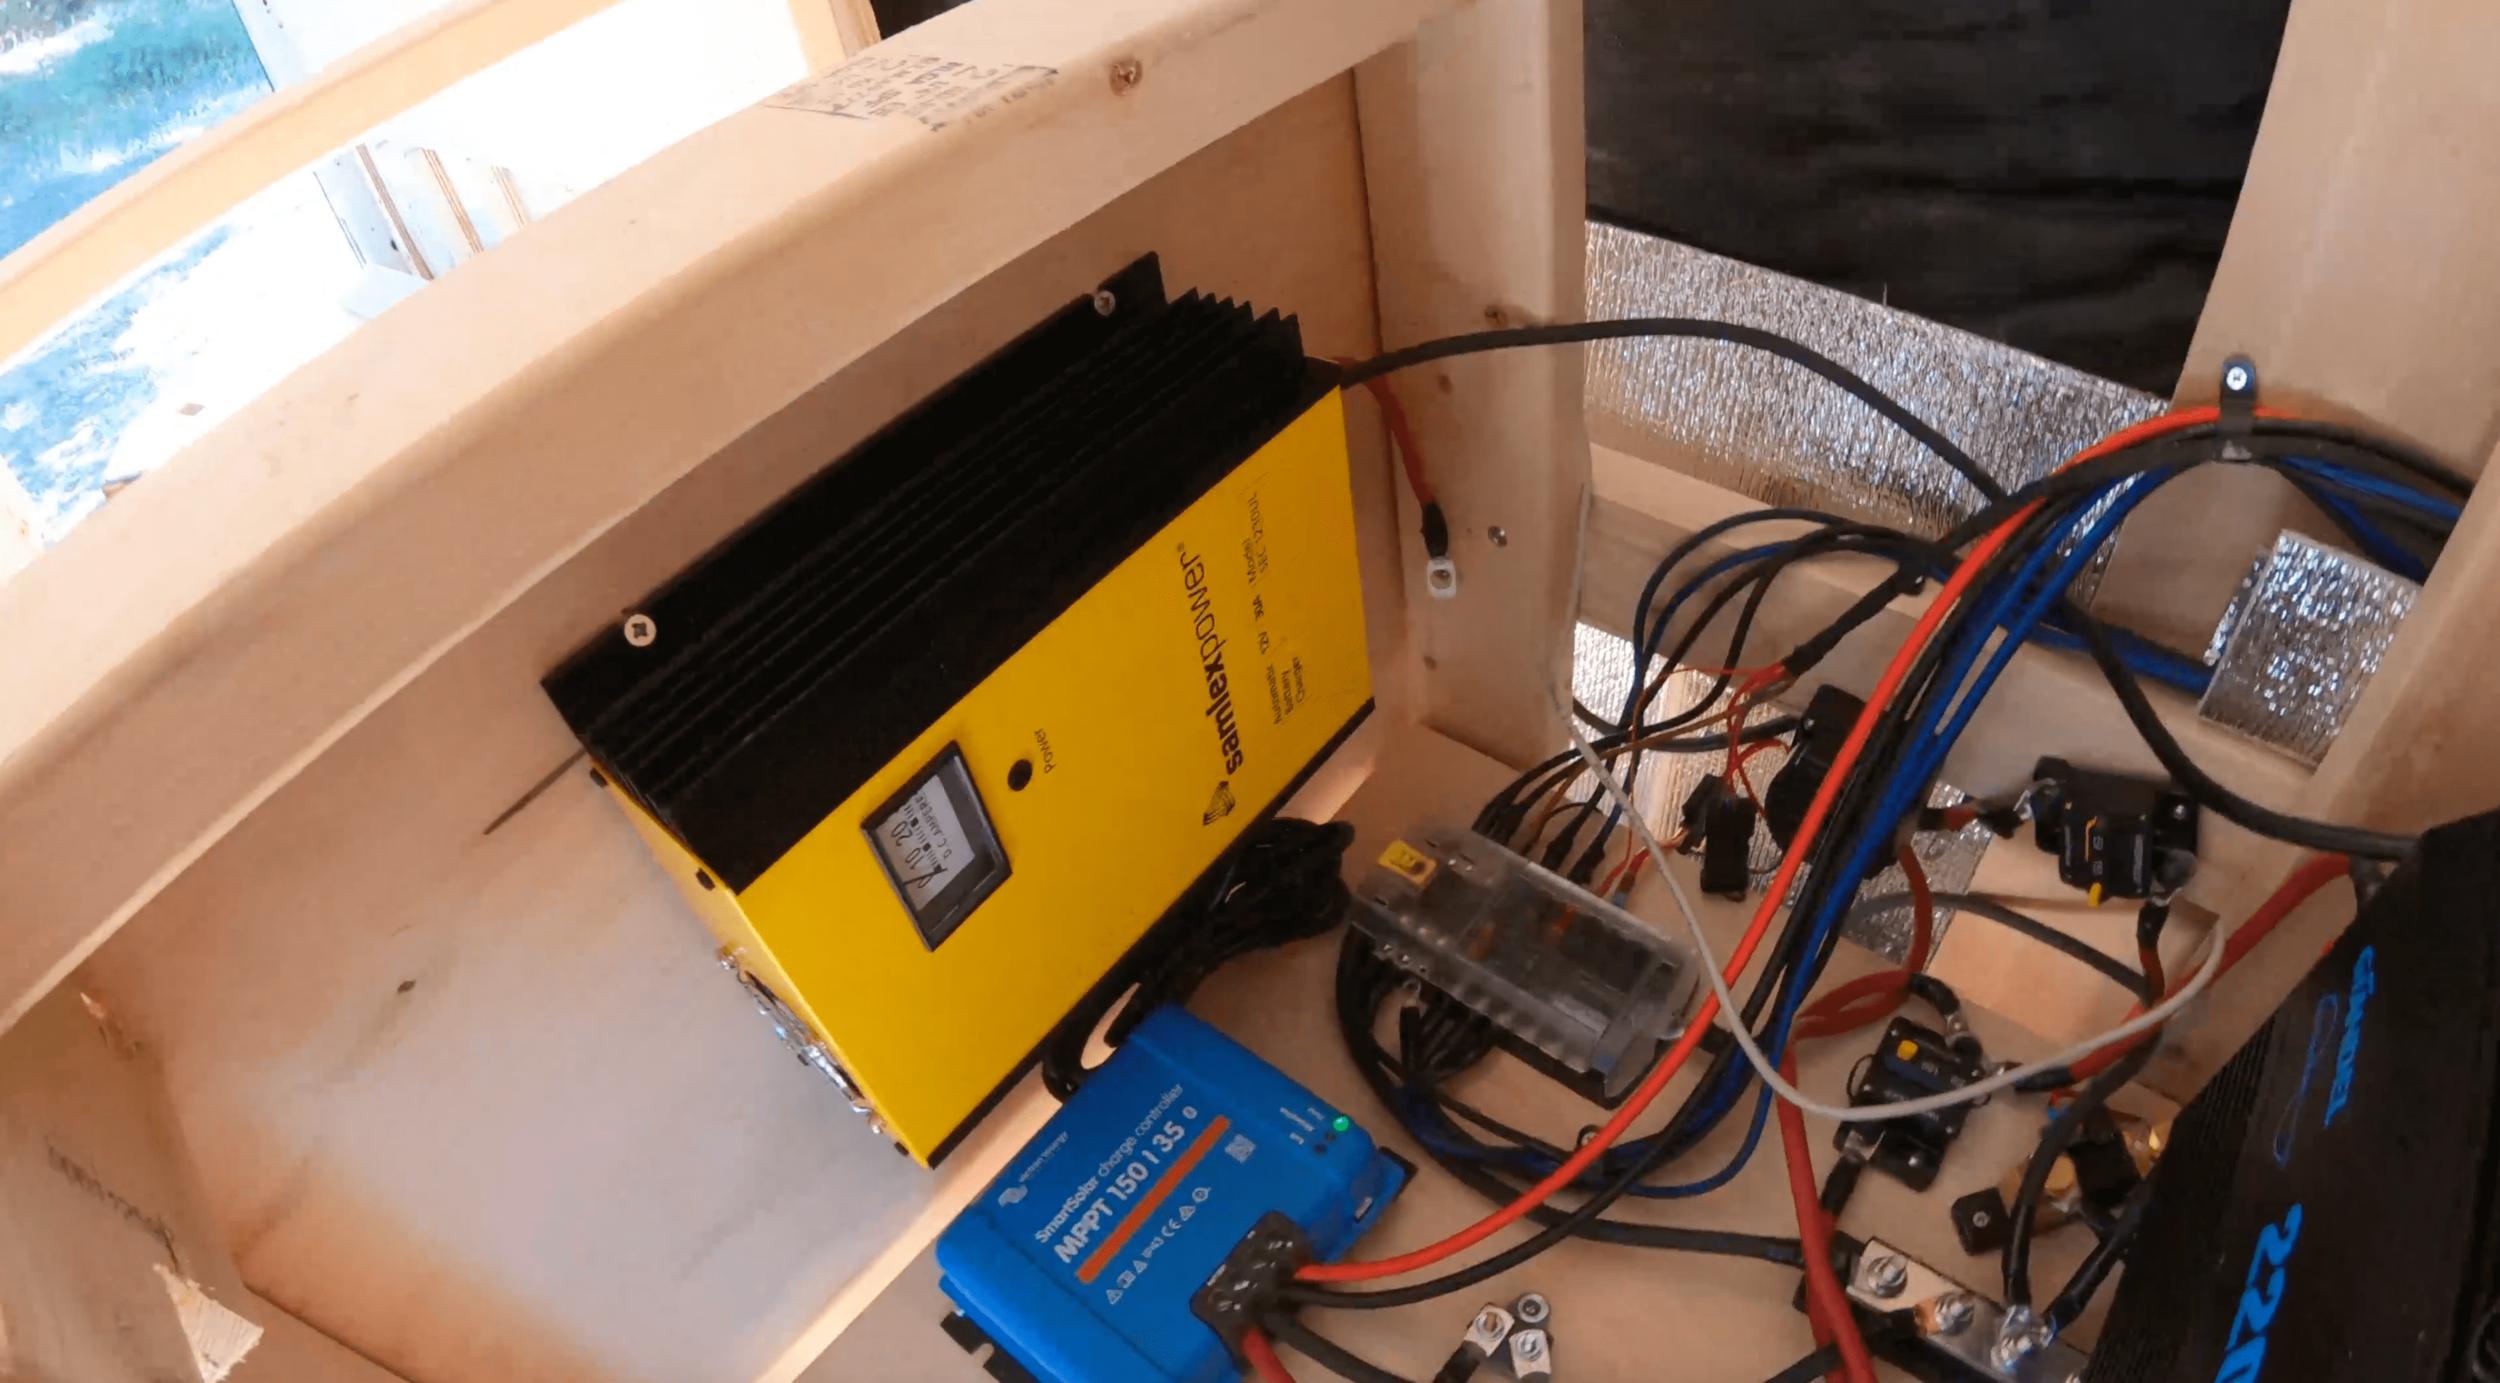
Due to the tight space into which the shore power box was being installed, I held the box up where it would go roughly, marked it off with a pencil, then went back with my 8AWG positive and negative cables and measured what length of wire I would need to run from the back of the shore power box to the 40a breaker (positive cable) and negative bus bar (negative cable).
I did this because it was easier to insert and tighten down the cables into the back of the shore power box with it unmounted rather than mounted and hard to reach.
Your first positive cable simply runs from the positive terminal on the back of the shore power box to one of the terminals on your 40a breaker. A second positive cable then runs from the leftover terminal on that 40a breaker to the positive bus bar in your system.
Your one and only negative cable runs from the negative terminal on the back of the shore power box to the negative bus bar in your system.
In the picture on the right, you can see my short red (positive) cable already with a terminal connector on it ready and waiting for the 40a breaker to be mounted. The negative cable is running off the back of the shore power box and hovering near the negative bus bar ready to be attached.


Step 4:
Mount your box and 40a breaker.
Once the wires on the back of my shore power box were sized, cut, stripped, had their terminal connectors attached, and wrapped in electrical tape I used wood screws to mount the shore power box to the space I had saved on the side of the battery box and then the 40a breaker right where the short positive cable coming off the back of the shore power box could reach it comfortably.
Step 5:
Cut the hole for the port and mount (and seal) the port!
If you’ve already installed windows and a maxxfan in your van, this is going to be the easiest hole you’ve ever cut in your van.
Find where on the outside of your van correlates to the spot on the inside you think is best for mounting the port and connecting the wire from the port to the wire from the Samlex power box.
NOTE: on my Transit there is a gentle curve right about where I wanted to mount the port so I simply drilled my hole right in the center of that curve where the port would have the most flat surface area to seal to rather than on the upper or lower parts of that curve.
Find a hole saw drill bit the same size as the port, drill a hole straight through, seal the cut edges of that hole with the Markal marker (this is the same one I used on my windows, yay for resourcefulness!), run Butyl tape around the back edge of the port (I ran an excess amount which got squeezed out when I screwed the port down, I cut the excess with a utility knife), stick your port into the hole, attach using your self-taping screws (I put 4 in which meant drilling two into the sides of the port where there was no provided hole, there were no issues from doing that), then seal the rim of the whole thing as well as the screw locations with Through the Roof Sealant!


Step 6:
Attach your port male cord to the female cord running off your Samlex power box.
This is such a simple hookup. A lot of people hardwire their ports and shore power boxes together but I went with a much more simple setup.
The port has a plug running off the back of it and so does the Samlex power box. These simply get plugged into each other and set out of the way.
Your system is now live and ready to get tested!
Step 7:
Test your system!
Once everything was hooked up (and the 40a breaker was switched so power could run through) I plugged my trusty panini maker into my AC outlet so that my system was being drained (if your batteries are full, which mine were, your shore power will not pull power into your system since there is no need for it / no place to put it, so to speak - you need to drain your batteries or put a high load on them-my panini maker-to get the power box to draw to it’s full capacity).
Using my battery monitor, I could see that my panini maker was drawing about 1,100 watts. Once my shore power was plugged in (I did this at night so solar was not a factor) I was only using about 700 watts. Which means the 30a shore power box was giving me about 400 watts of power. So cool!! Or at least, I think it is. I’m a nerd for the van electrical though.


Final thoughts:
If you have already built (or plan to) your big, scary electrical system, adding in shore power is almost a no brainer in its simplicity.
It brings me peace of mind knowing that if I need to, I can plug in at a friend’s house or campground to top off my batteries if the weather has not permitted my solar to fill them up and I have not been driving enough to use the battery isolator.
It took me a little bit to piece together what I would need for my system, but I am happy I found this simple setup!