Upgrading Ford Transit with Sumo Springs
Materials Needed for this project—>

I’m here for ya.
Seriously! Reach out on Instagram or YouTube with questions.
If you get bored, the video is also pretty great.
Step 1:
Decide if you want both front and rear or just rear springs.
Some people only go with the rear springs (the yellow ones) as I think they contribute the most to the difference in the ride of the van. But, why not go with both if you can? I can say with confidence that my van feels completely different with SumoSprings installed. I’ll bet the front and rear in combo have a cumulative effect.


Step 2:
Jack the rear of your car up on a level surface and get to work.
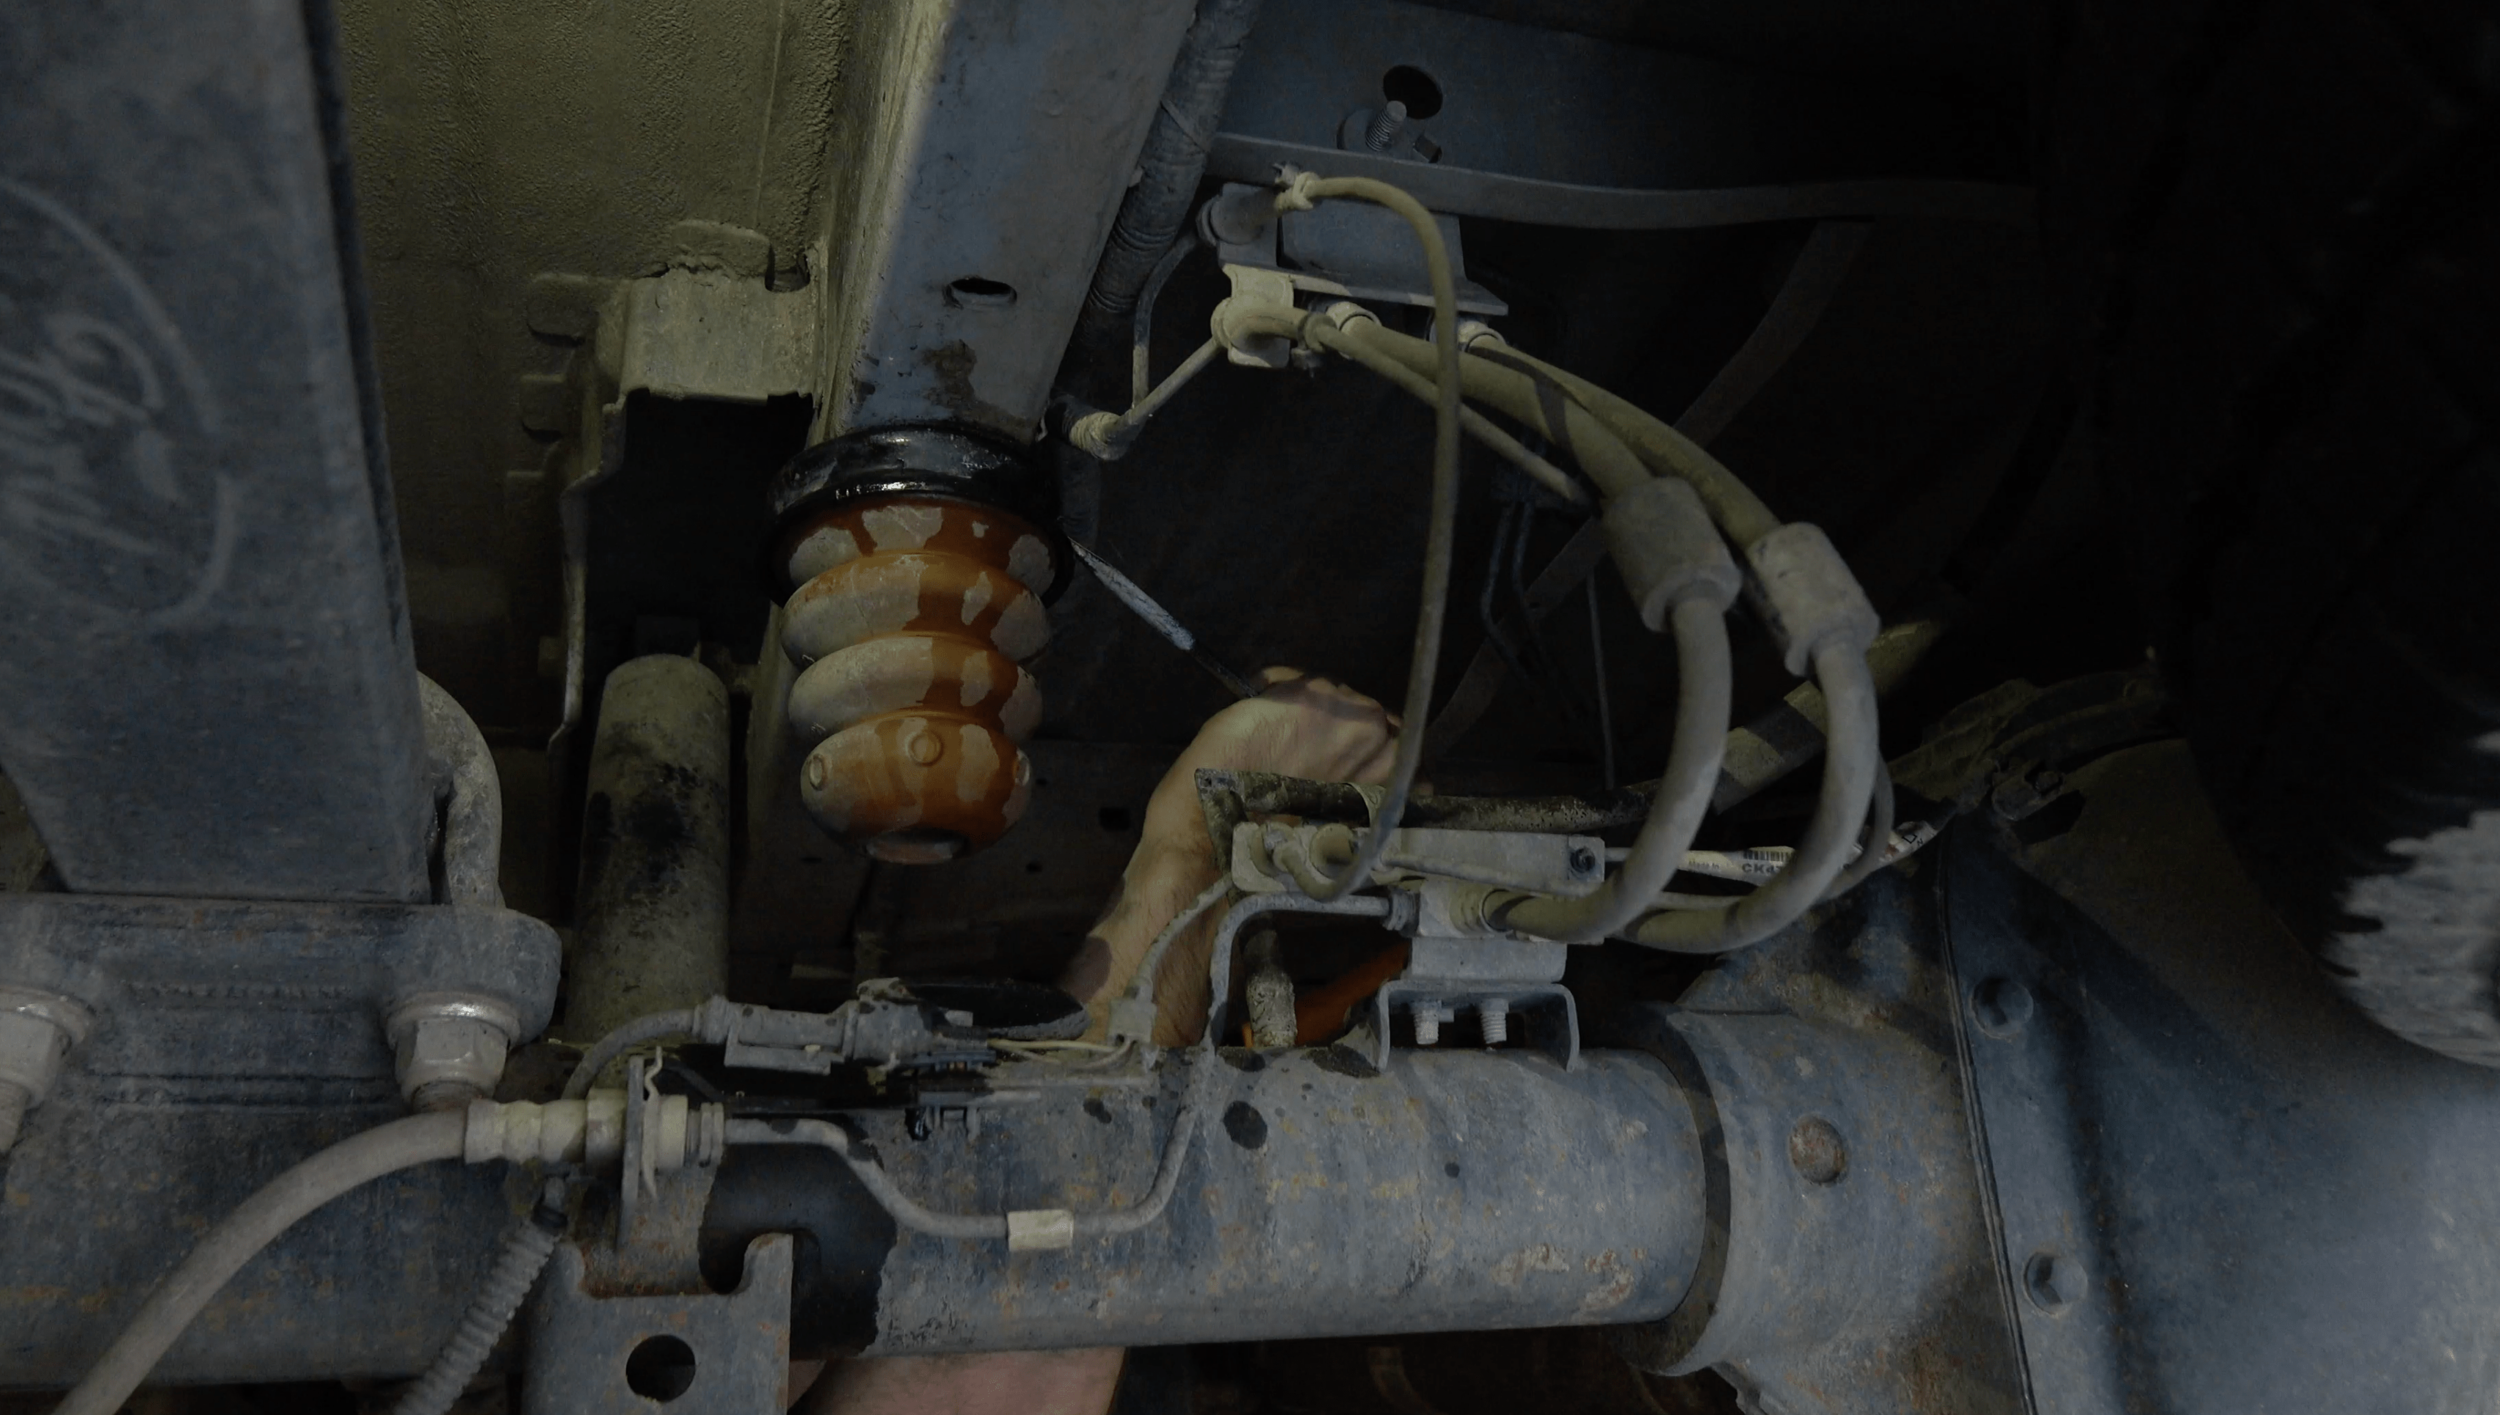
Once your car is jacked up, locate the factory bump stops. They look like the little sad, faded-red poop emoji shaped things (as shown to the left).
PRO TIP: a lot of people hammer away at the metal mount encircling the little poop emoji bump stops on their vans. This is NOT necessary on a Transit. Simply push/pull the rubber part of the poop emoji off (it pops right off, don’t worry).
Once it is popped off, the bolt holding the metal mount is accessible (you will use this same bolt hole for installing the new springs). Remove the bolt, which releases the metal mount. Now you’ve removed all of the factory parts! Great job.
You’re probably filthy.
I went ahead and cleaned the frame’s surface (with soapy water) where the factory bump stop metal circle was previously resting. Might as well do this right, right?
Step 3:
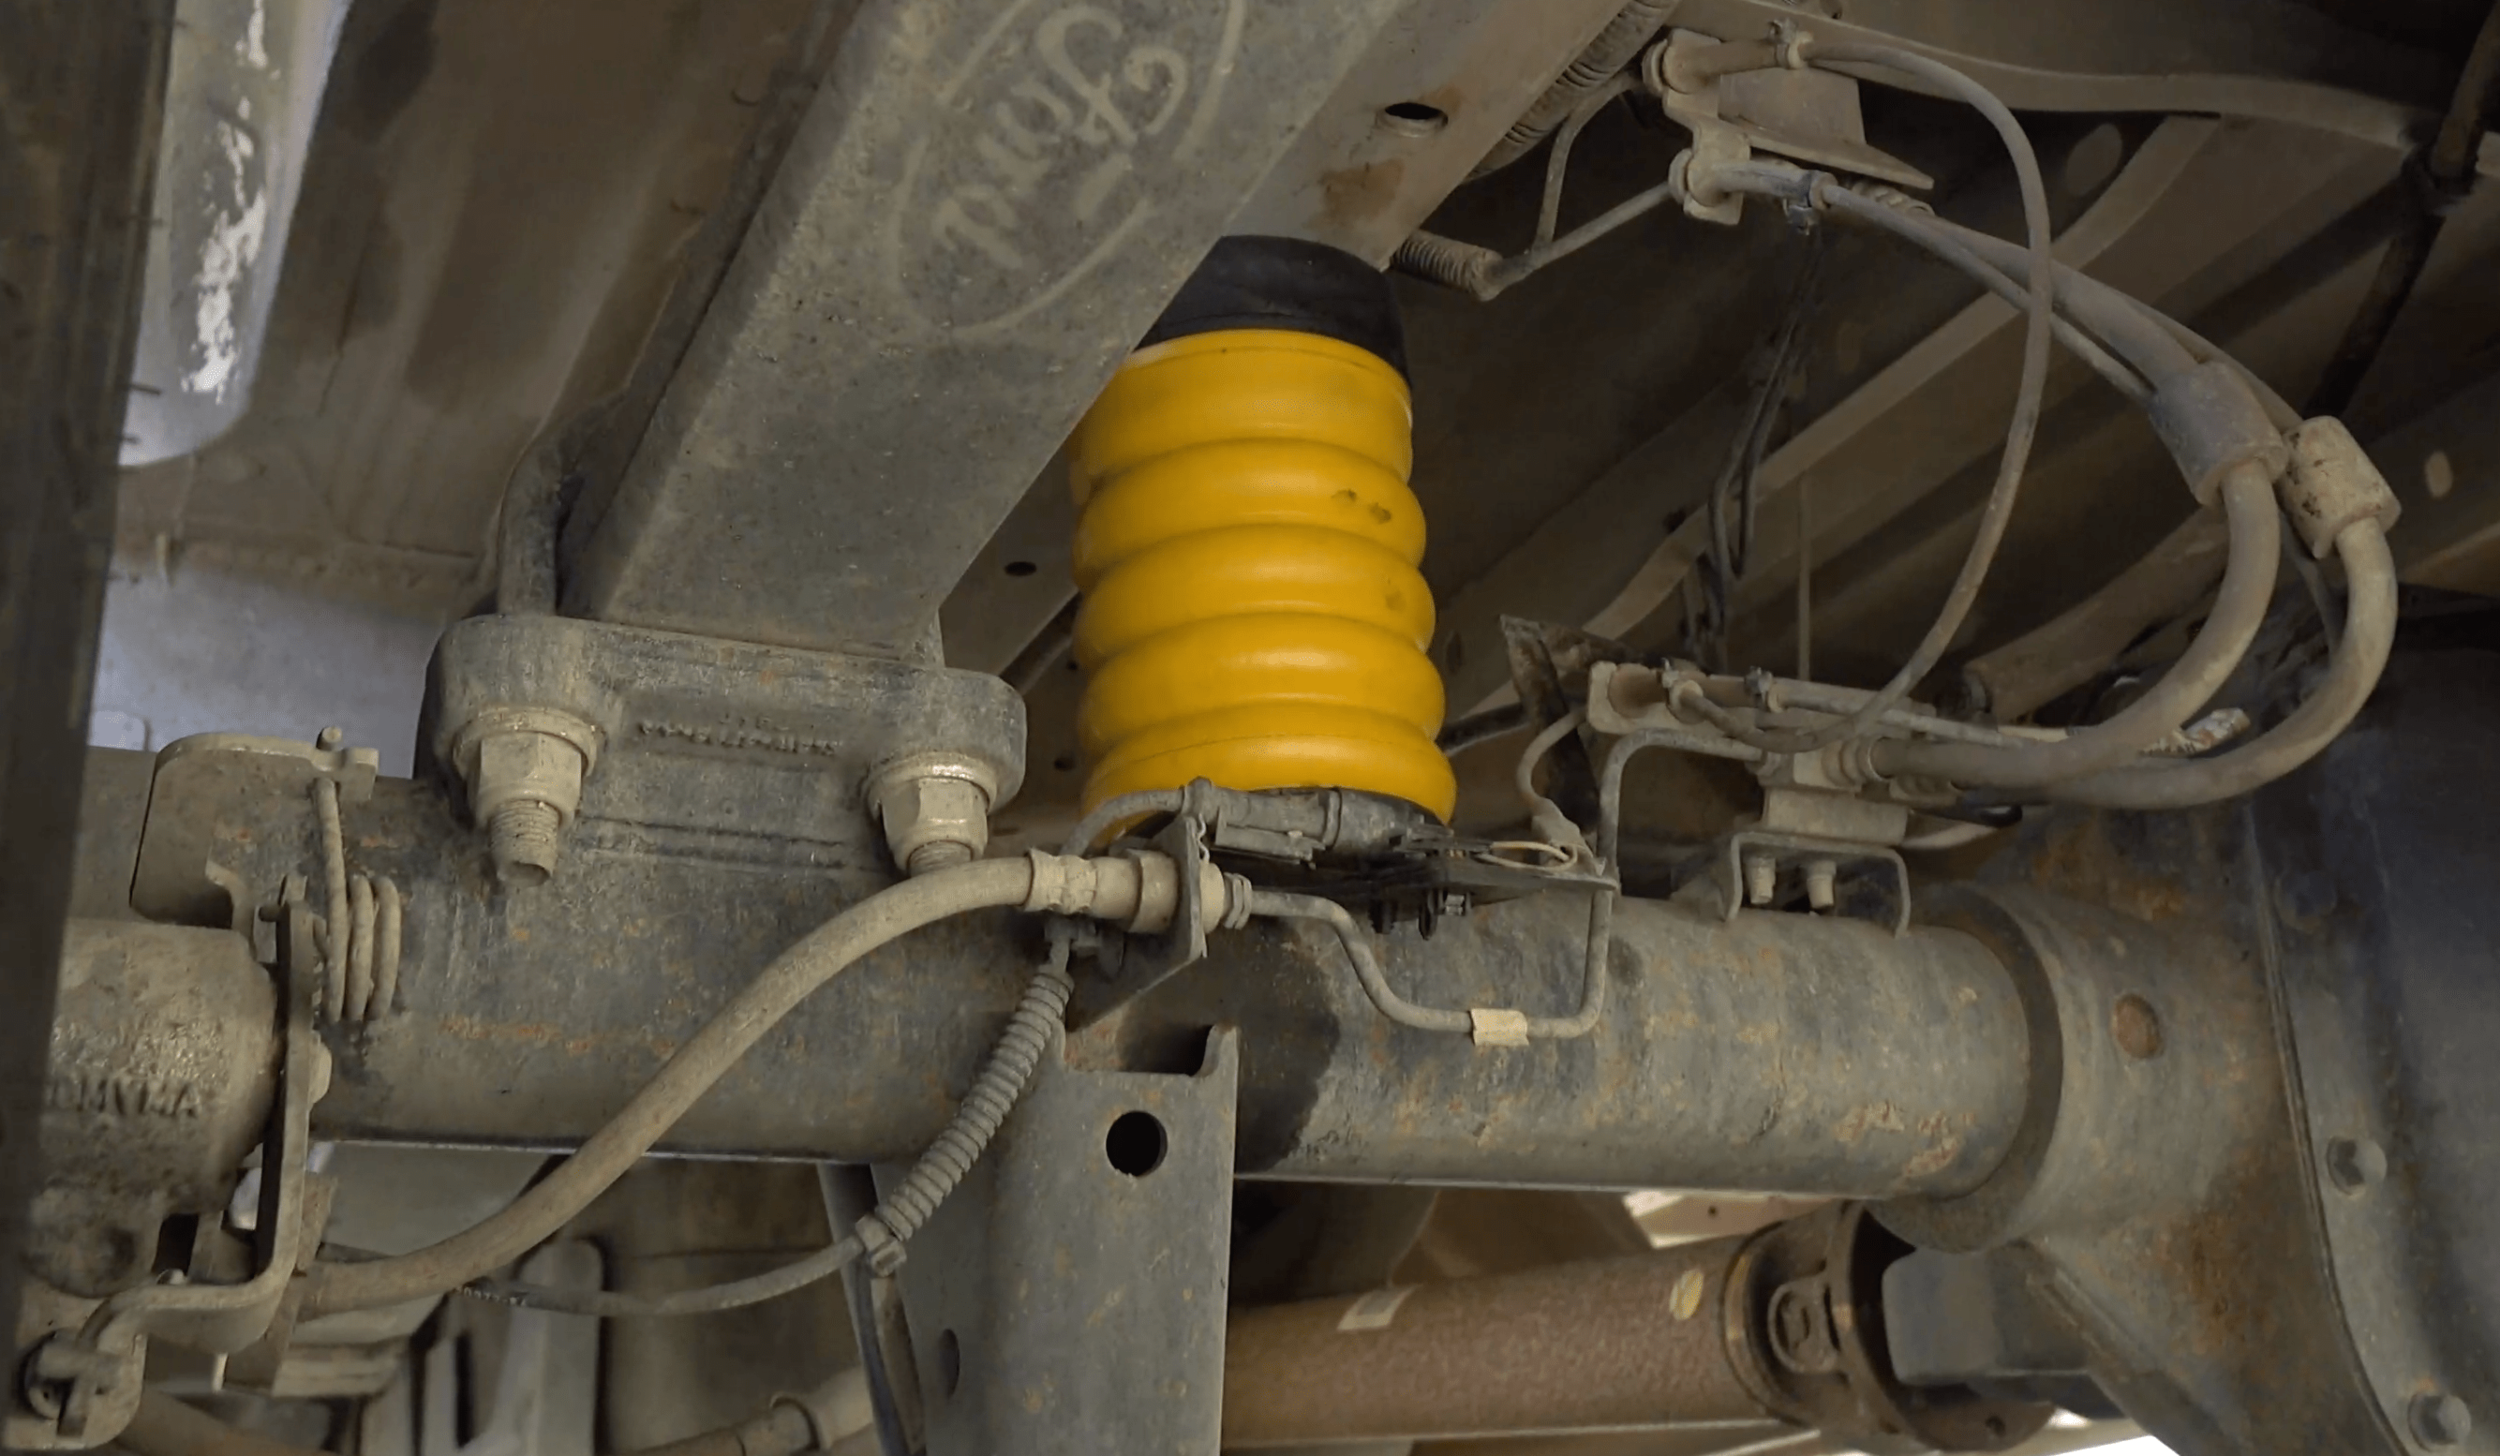
Bolt on the new bump stops!
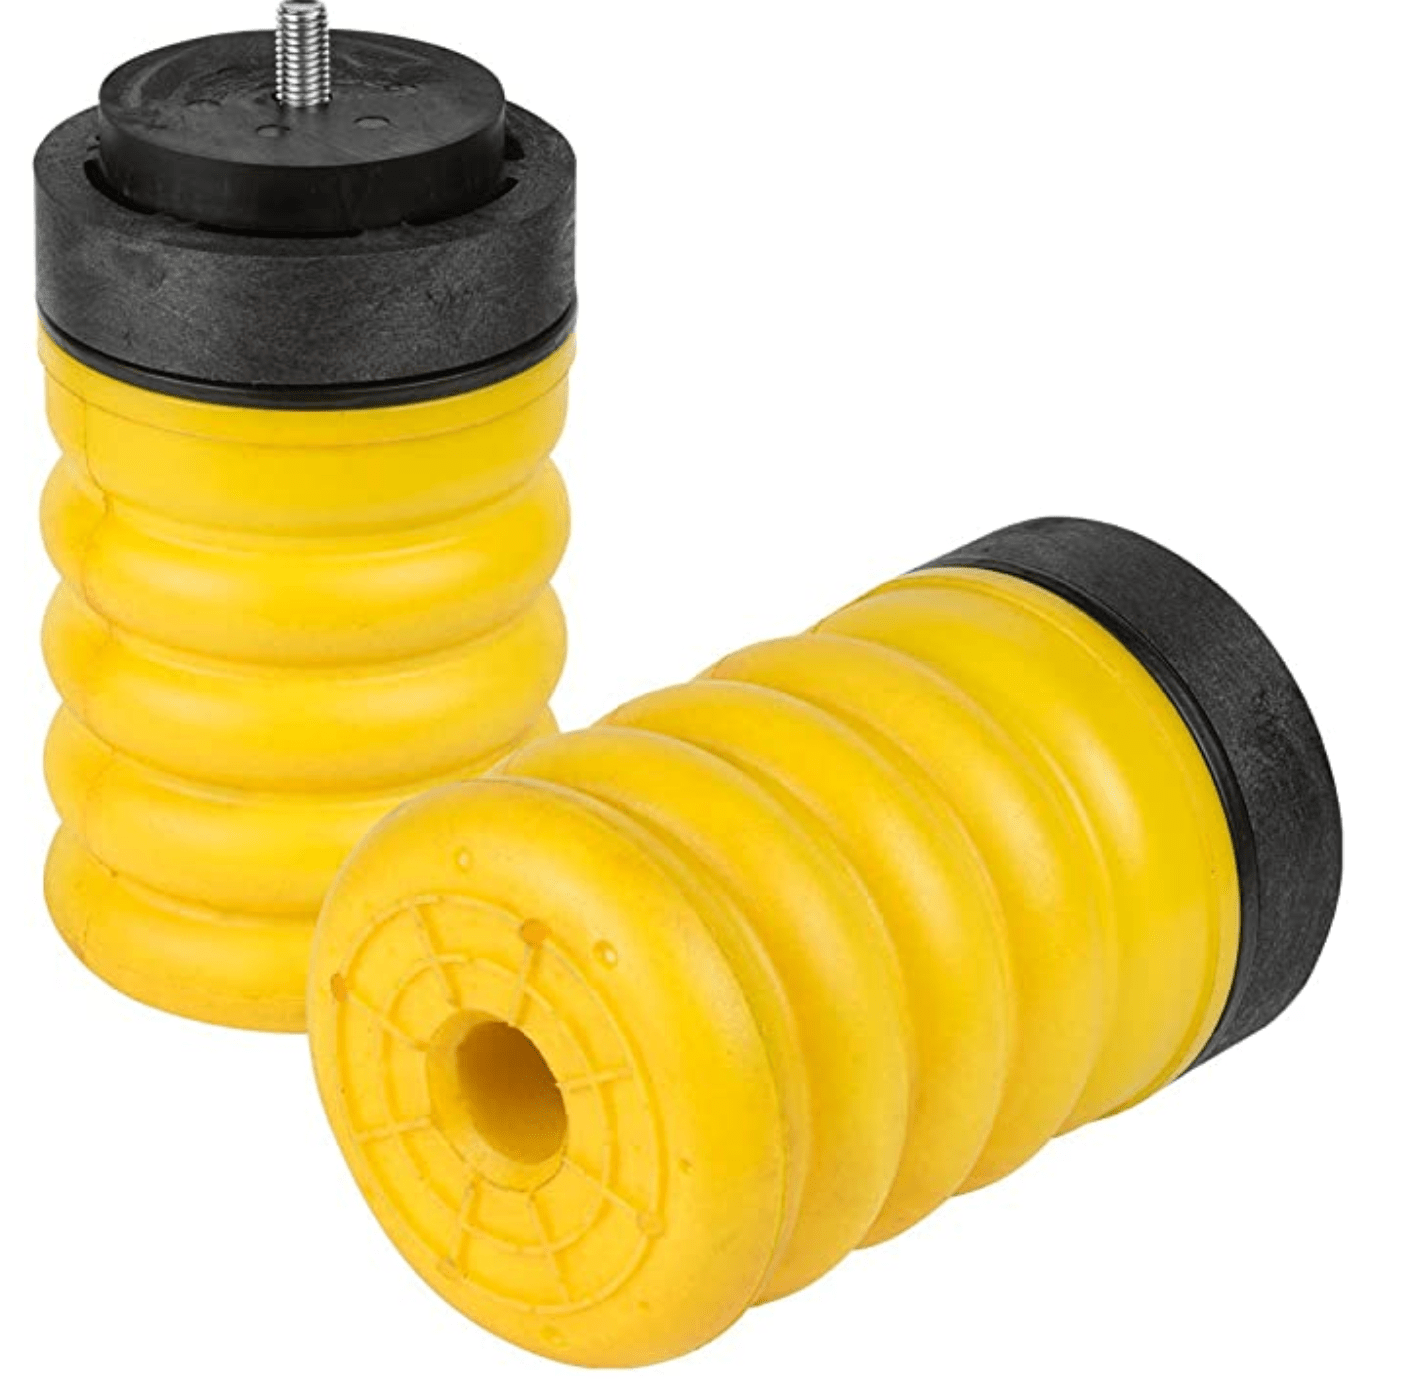
Inside your SumoSprings box, there are several black, metal “spacers.” With my 2019 148” wheelbase mid roof Transit 150, I selected the 1” sized spacer (not the super thin one). Take the longer of the bolt sets (my box came with two sizes of bolts). Insert the bolt straight through the center of the yellow rubber spring. Place the metal spacer on the flat side of the yellow spring sliding it over the bolt now sticking out.
Find an extender for your socket wrench that can fit through the body of the yellow spring and reach the head of the bolt.
Now, underneath the van the fit may be VERY tight. We had to hand-tighten the bolt (hand tightening the extender of the socket wrench) before the actual socket wrench body could fit underneath the whole thing.
Once you’ve hand tightened enough and there is more clearance you will be able to attach your socket wrench to the extender and tighten the whole thing down firmly.
NOTE: you can use the Threadlock they include in the packaging if you so wish. I did not. 15k miles later they have not moved.


Step 4:
Jack up the front of your van for the next (easier set of springs).
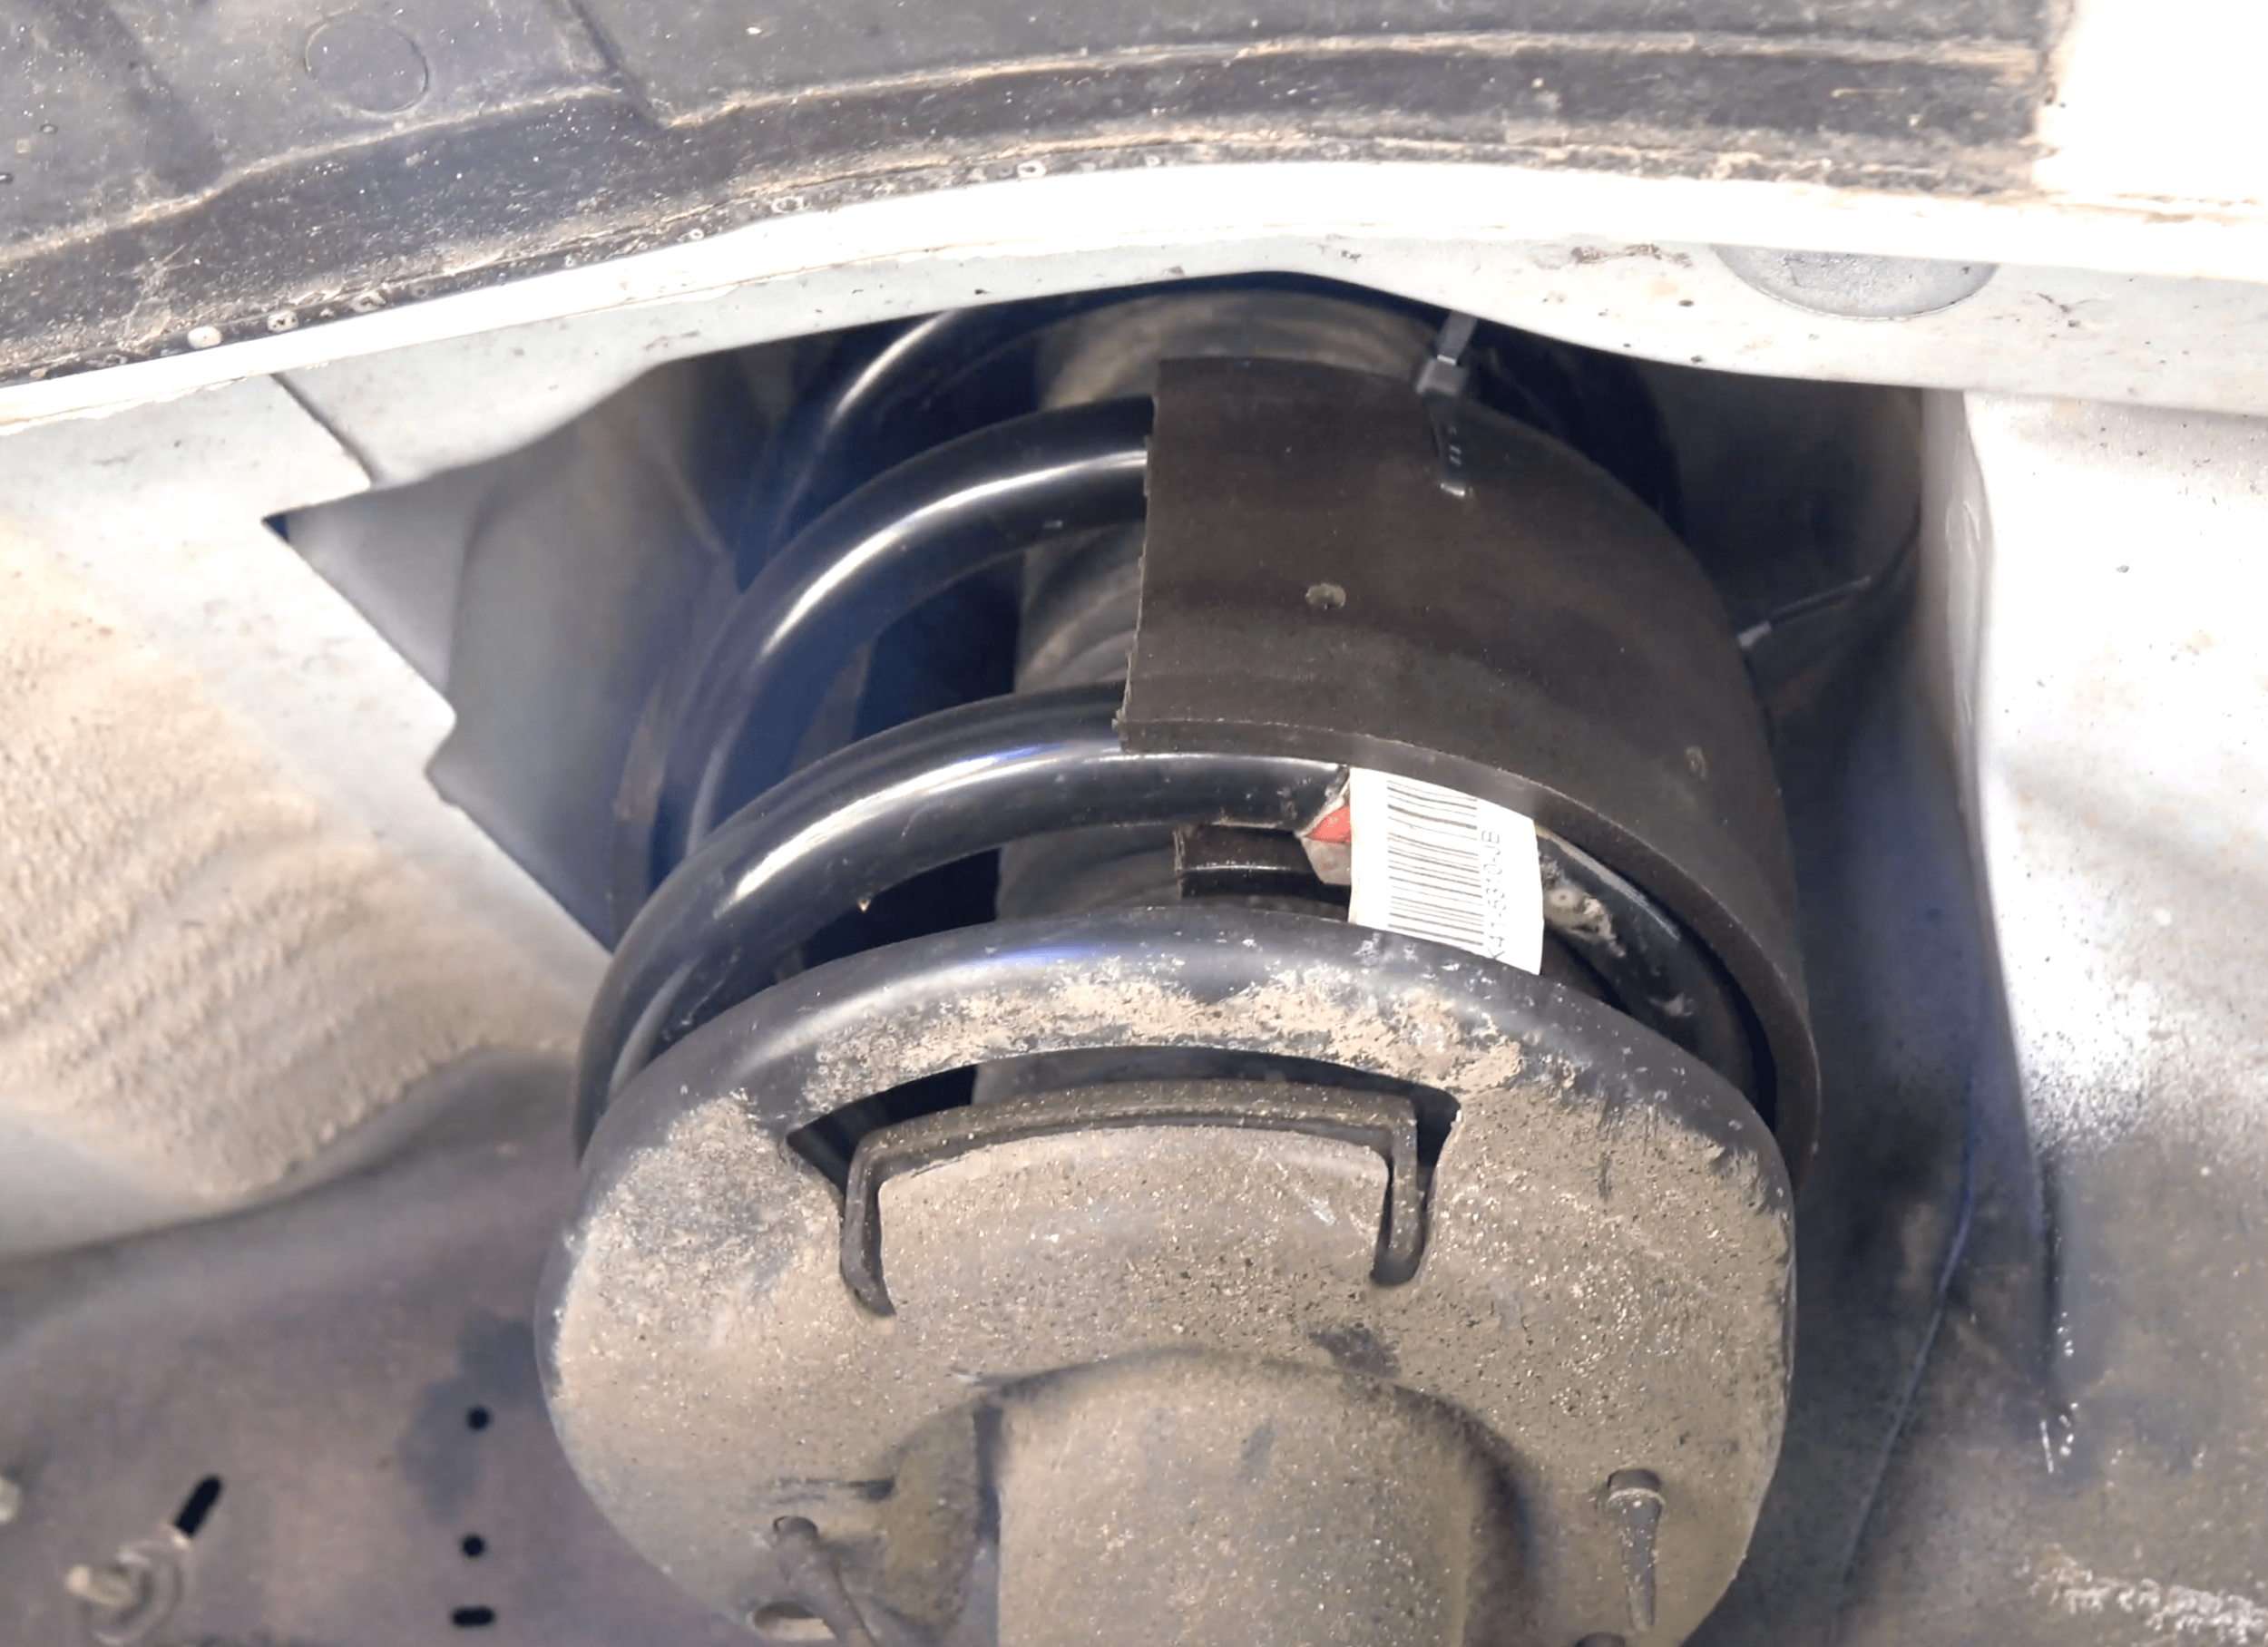
The black pieces are much easier to install.
First step after the car is jacked up, clean the dirty metal springs!
After they have been cleaned, take the black piece with the DEEPER groove facing downward, and start to feed the piece onto the spring. If you get the top and bottom started at one point on the metal car spring you can slowly feed the whole thing on with little trouble.
One thing to note: the instructions tell you to use your hands to man-handle the pieces into place since using tools could damage the plastic/rubber piece.
Once the piece is slid into place where you want it, simply take the zip ties that came with the springs and feed each one through the little hole in the black spring, tighten down, and cut the extra off.
Final thoughts:
I can’t tell you how happy I am with this cheap and simple DIY upgrade for the van. The van went from feeling like a sailboat rolling about to something closer to what an actual car feels like when you drive, make turns, have wind rock your van! Love it.
One thing to note: one of my front spring upgrades has slowly slid downward on the spring. I believe this is because I did not tighten the zip ties on that particular piece well enough. So, make sure YOU do!
Cheers!
